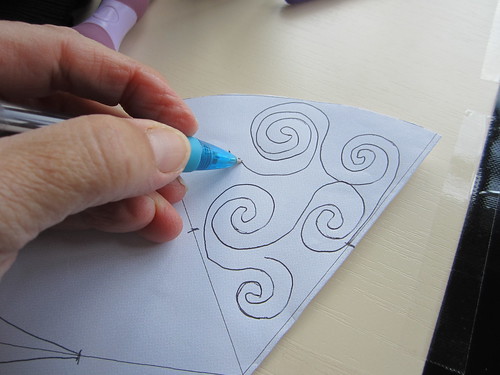
Before you start Free Motion Embroidery with your sewing machine, draw your designs with pen or pencil on paper. This gets you used to the flow of the design – especially the spiral where you have to leave yourself room to go into the middle and back again.

then it is time to start. Lower or cover your feed dogs. ( If you are using a slippery sheet, tape your Teflon sheet over the work area to make it nice and slippery)
Drop and raise your needle to pull up the bobbin thread. Do a few stitches on the spot to secure the ends, spread your hands over the work and move it so that the stitches form your chosen design. I use the Pfaff Free-Motion guide grip http://www.pfaff.com/AU/3483_14637.html, this makes it easy to move the fabric.


Divide the circle design into six sectors and free motion each in a slightly different design. Once you have embroidered all the sectors cut the fabric you have produced into a circle.
Satin stitch the edge. Set your stitch to about 0.4 length, 4.5 width, If your bobbin case has a finger with a hole in it, thread the bobbin thread through the hole to put more tension on the bobbin.


To strengthen the edge, widen the zigzag to 5.5mm the stitch some cord or rattail onto the edge.
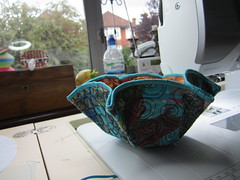
Once this is done, decide which way up you want your fabric. I was originally going to have the blue side inside but changed my mind once I had tried it with pins.


I forgot to photograph the stitching of the six edges, basically starting about 1cm in from the folded edge, sew 

Lovely Clare, can't wait till I see it in real life next week. Thank you for showing detail pictures of the process. I know that is a lot of work, but very helpful.
ReplyDeleteVery nice! Looking forward to making one myself. I'll bring bits and pieces - sure to have some in my sewing room!!!!. That fabric gripper thingy looks a great idea - I use quilting gloves and my fingers can be attacked by the needle.
ReplyDeleteSheila in Brussels
I found you :-) Great tutorial will have to give it a go when I get five minutes to myself. Thanks for sharing
ReplyDeleteThat "bowl" is cute :) and looks perfect for storing and displaying pretty yarns.
ReplyDeleteThank you so much for the lovely comment on my blog too.